Introduction to Trézor® Hardware Wallet
Trézor® is a leading hardware wallet providing secure storage for cryptocurrencies and digital assets. Unlike software wallets, your private keys never leave the device, ensuring that your funds remain safe from online threats.
Using Trézor® together with Trézor.io/start® allows a smooth, secure setup process for new users and ensures you are always following best practices. Whether you're managing Bitcoin, Ethereum, or other altcoins, this guide has you covered. 🌟
Step 1: Unbox Your Trézor® Device 📦
Carefully remove your device from the packaging. Ensure the following are included:
- Trézor® hardware device
- USB cable
- Recovery card
- Quick start guide
Inspect the packaging for any signs of tampering. If anything seems off, do not use the device and contact Trézor® support immediately. 🛑
Step 2: Connect to Your Computer or Mobile Device 🔌
Use the provided USB cable to connect the device to your computer. Nano X users can also pair via Bluetooth to supported devices. The screen on your Trézor® will turn on automatically.
Step 2a: Install Trézor Bridge
Visit Trézor.io/start and follow instructions to install Trézor Bridge. This software allows your device to communicate securely with your computer or browser interface.
Compatibility Tips
- Windows, macOS, Linux supported
- Ensure browsers are updated to latest versions
- Disable extensions that may interfere with USB communication
Step 3: Initialize Your Trézor® Device 🧭
Once connected, choose to create a new wallet or recover an existing one. You will set a secure PIN on the device.
PIN Security
Pick a PIN that is memorable but not easily guessable. Avoid sequential numbers or repeating digits. Every time you connect your device, the PIN will be required to unlock it.
Step 3a: Generate Recovery Seed ✍️
The recovery seed consists of 24 words. This is the most important backup of your funds. Write it on the provided recovery card and store it offline in a secure location.
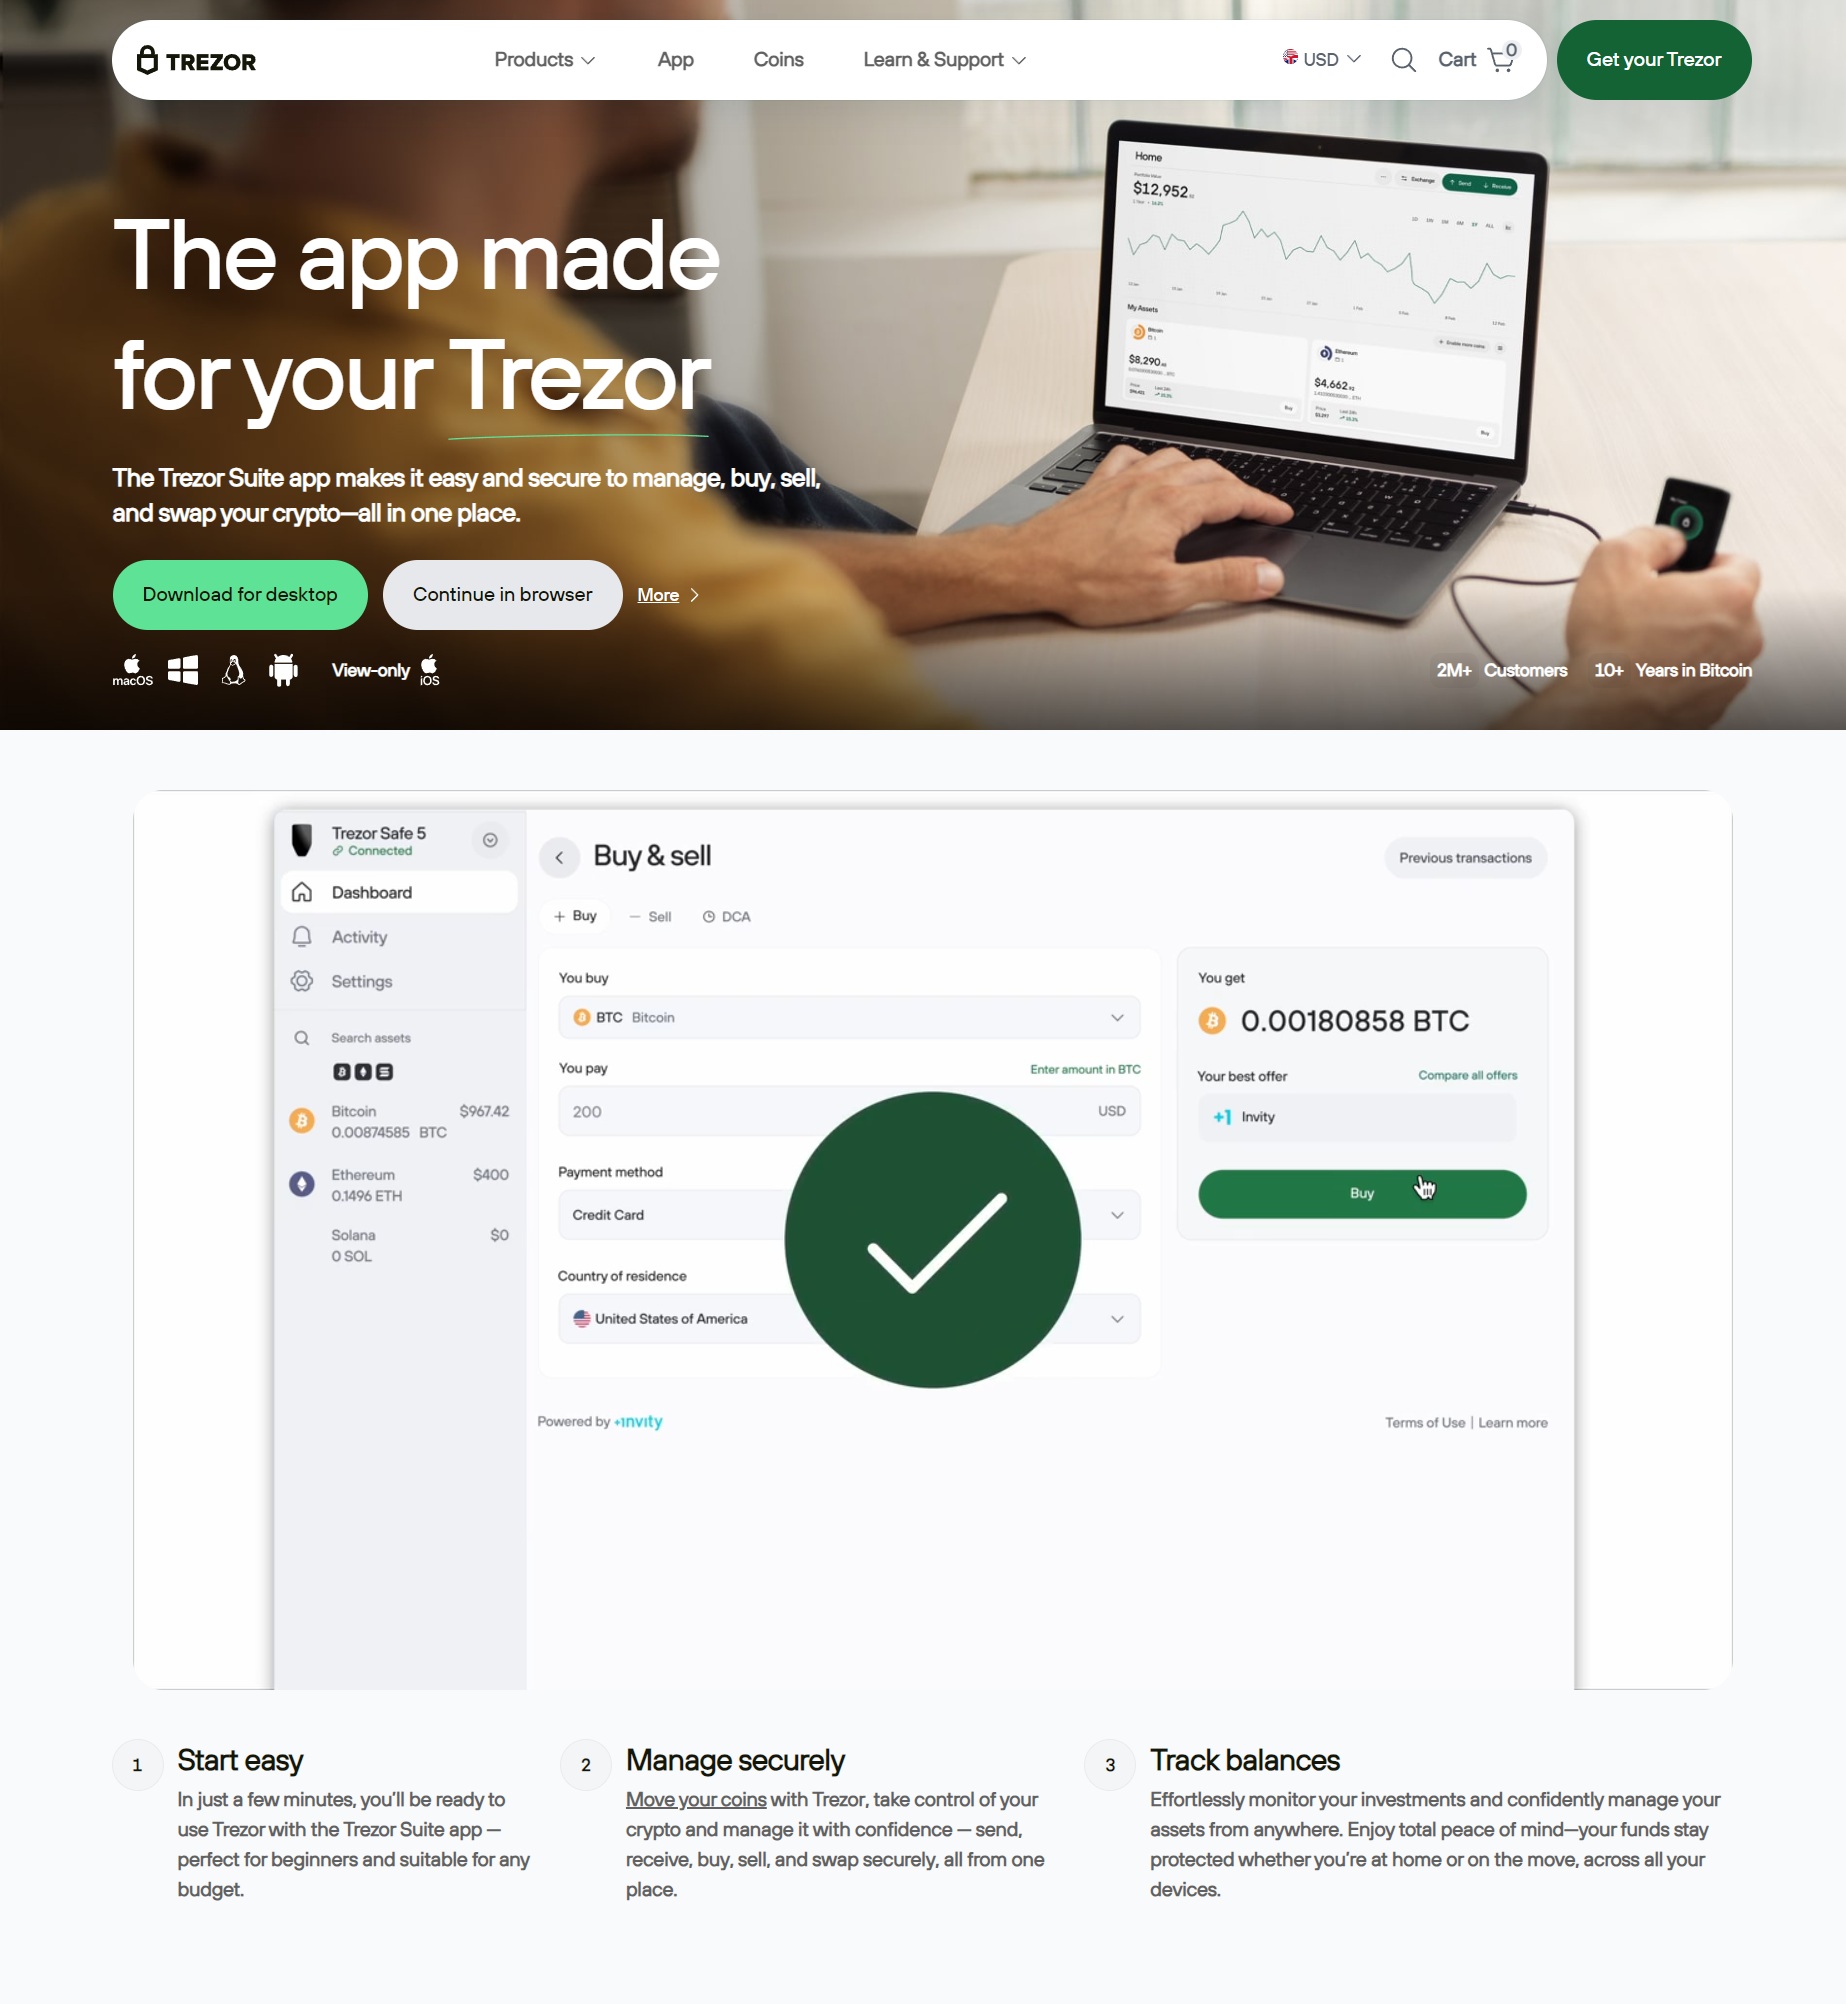
Step 4: Access Trézor Suite and Ledger Integration
Once initialized, you can use the Trézor Suite or supported wallet applications to manage your crypto. The Suite provides an interface to send, receive, and check balances across multiple coins and tokens.
Adding Accounts
- Click "Add account" in Trézor Suite
- Select the cryptocurrency
- Confirm account setup on your Trézor® device
Transaction Confirmation
All transactions must be confirmed on the Trézor® device screen. This ensures your private keys never leave the device and reduces the risk of malware attacks. ✅
Step 5: Security Best Practices 🔒
- Keep firmware updated regularly
- Never share your recovery seed
- Verify transaction details before confirming
- Use official links and apps only
Advanced Security Options
Consider using a passphrase for added security. A passphrase can create hidden wallets accessible only when the correct phrase is entered along with your recovery seed. 🛡️
Step 6: Troubleshooting Common Issues 🛠️
Device Not Detected?
Try reconnecting your USB cable or switching ports. Restart Trézor Suite or refresh the browser.
Recovery Seed Problems
If your recovery seed is lost, access to the wallet is permanently lost. Always keep multiple secure offline backups.
Support & Resources
Official support: https://trezor.io/support
Step 7: Advanced Features 🚀
DeFi and NFT Integration
Trézor allows interaction with decentralized finance (DeFi) protocols and NFT management through secure integrations. Always confirm all on-device prompts.
Portfolio Management
Trézor Suite provides portfolio overview, staking options, and detailed transaction history for all connected accounts.
Multi-Device Setup
You can manage multiple Trézor devices under one Suite interface. Each device maintains isolated keys, adding another layer of security.
Final Words 🌟
Following this guide ensures your Trézor® hardware wallet is set up securely, your assets are protected, and you have full control over your digital portfolio. Remember to back up your recovery seed, use official links, and verify all transactions on-device. Happy hodling! 🚀
Start Your Trézor Now